Surprises from an Organic Farm

I admire those who undertakes organic farming operation. They are willing to sacrifice many convenience offered by convention farming. I had a chance to volunteer in a farm which is not certified organic, but definitely operated as other certified organic farms.

Just one or half day on the farm is enough for me to abandon this practice.

Don’t get me wrong about the safety or nutrition value of organic produce. When I buy produce at a grocery store, I buy organic produce as much as possible. What alert me are the rampant of pest and diseases, and the degradation of soil. 

Compared to my nature farming approach, the farm did not measure up to my expectation toward an organic farm.

Maybe it due to the tilling or organic fertilizer the owner uses. Maybe the soil is better than 15 years ago when the farm switched to organic practice. I don’t know. I expected the farm as diversified as my place.

When helping digging carrots or potatoes after the farmer plowed up a row for me to work, I was surprised to find that there were few earthworms than I expected, even fewer than  my worst unplanted Sandy plots,or the plot with hard clay.

Though I my garden had lots of insects during the growing season, the farm I volunteered has even more, with fewer varieties. I say this through my training as an entomologist 4 years in college. I also didn’t see any visible sign of mycelium when digging into the soil. 

Sucking insects belonging to hemiptera are swarming and crawling in large population, destroying the farmer’s hard work. I didn’t see other insects often. 

I worried about this farm. It represents many other organic farms. Maybe I should volunteer in other organic farm to find out  more. The experience I had in that farm made me more headstrong in nature farming.

Mix Your Own Insect Repellent: What Others Put in Their Nature Repellents?

Before finding the nature ingredients that really need one application per day, even for days, I want to share you fellow  nature farmers something you can mix up yourself to repel biting insects.

After posting a working essential oil repellent recipe with my personal herbal extract,a company which sells insect repellent contacted me. The post was written in Chinese , to help friends and families prevent Dengue Fever, a disease spreads by mosquitoes. At that time, there were few hundreds of deaths caused by Dengue Fever in just one city. People were crying for help. I certainly could make some capital by selling repellent to them, but I don’t like to rob people in their desperate needs. I shared my recipe for free.  You can read it at the bottom of this post. Unfortunately the post does not have web link that you can click to. I copied and pasted it at the bottom of this poast in case you can read Chinese.  Or you can go to My Facebook page to the public to find it. The translation function is on, so you can read it in English.

The person who contacted me is someone from the same entomology department I studied, but is way younger than I. Though said he wanted me to cooperate with his repellent business, he didn’t really make any offer. I was surprised that he as a seller of nature repellent, didn’t really do any research about other’s ingredients. He sells just what he found useful: distillate of bamboo, a by-product of bamboo charcoal.

In Chinese culture, the elder students are supposed to take care of the youngsters. So I immediately did some web search and made a chart of ingredients from other insect repellents on market, and sent the chart to him. I even made  several herbal extractions and sent by express mail to Taiwan for him to try. The shipping was quite expensive. Few months later, I asked him about the testing result by texting. He didn’t even replied me.

Oh, well, those ingredients are not secrets. You can find them out if you do some research. Since I gave the chart to him, I can share it to my readers. ( I unfriended this fellow from my Facebook before writing this post.)

The problem of essential oil is that most of them are diluted , to about 3% in carrier oil. When you mix 2 different kinds of essential oil by the same volume, the concentration of each kind drops to 1.5%. The more different kinds of essential oils in a mix, the lower concentration is each kind. Maybe the synergistic effects of the combination can compensate the effects of dilution. The scents repel biting insects. After applying on skin the scents keep evaporating by body heat. About half hour you need to reapply.

Fun thing is , diluted essential oil in grain alcohol , say 20 drops in 7 ml of 95% grain alcohol has almost same effective repelling time as pure essential oil. Maybe there’s something about the physical kinetic of the fragrance molecules, that certain molecule needs to absorb enough thermo energy (heat from human body) to escape to the air.

One day my daughter and I went to nearest Kohls to pick men’s perfume for my son’s birthday. Our nose had a kind of bitter, painful sensation after sniffing many samples, that the saleslady offered us roasted coffee beans to sniff to cancel the effect.I don’t know the proximate concentration of each absolute in perfume, but this made me think if  anyone can stand the full strength of absolute. The 3% essential oils already have pretty strong scents.

Enough for story. Here is the chart I made from web research.

 Ingredient  Listed Scientific Name  A  B  D  E  F  G H
Cedarwood Cedrus Atlantica V V 2% 1.50% V V
Citronella Cymbopogon Nardus V V 4% 10% V V
Eucalptus V V
Geranium Pelagonium Graveolens 1% 0.05% 2% V
Juniper Berry V
Lavender V V
Lemon V
Lemon Eucalyptus V
Lemon Grass Cymbopogon Schoenanthus 2.0% 1% V
Peppermint Mentha Piperita 1.0% 2% V V
Rosemary Rosmarinus Officinalis 1.5%
Tea Tree V V
Vetiver V
Wintergreen Gaultheria Procumbens 0.5% V
p-menthane-3,8-diol 65%
Smoke scent V
Castor Oil Ricinus Communis 10% V
Coconut Oil V
Soybean Oil Glycine Soja 23% 11.5% 2% V
Witch Hazel V


B: Repel, http://www.amazon.com/gp/product/B004N59OFU/ref=as_li_tl?ie=UTF8&camp=1789&creative=9325&creativeASIN=B004N59OFU&linkCode=as2&tag=mousegeniu-20&linkId=AVAZUYVO5MUMVAON
A:Bug Away Herbal Bug Spray, threesistersherbals.com
C:Swamp Spray, doorcountysoaps.com/Swamp-Spray-Natural-Bug-Spray-p/hs21.htm
D:BADGER ANTI-BUG SHAKE & SPRAY, http://www.badgerbalm.com/p-465-anti-bug-shake-spray.aspV
E: All Terrain, Kids Herbal Armor, Natural Insect Repellent, http://www.iherb.com/p/4282
F:Insect Repellant Spray, http://www.jason-personalcare.com/product/insect-repellant?

G:

H:Buzz Away, http://www.whenthepigsfly.com/2013/07/the-dangers-of-conventional-bug.html

Some  shows exact species they use, some just gave common names. Some shows percentiage, while others just listed what they used. I wonder the essential oils they used are those 3% dilutions.

我下田的防蚊配方大開公!
八月底回台灣的時候去了高中同學會,有在台南的同學唉說大家不能到台南聚會,因為台南登革熱疫情慘重…
因為是我高中最要好的同學之一,我就很大方地分享了我的防蚊配方…
本來是我要自製來發財的,看來目前要量產是不可能的,如果能夠救人一命也好…反正我相信主耶穌會幫助我從別處得貨財,所以,乾脆在這裏也大方分享好了…雖然我的部落格平常訪客冷清,總是會有人看到的…
從事自然農法的最大問題就是蟲多…每次多一種吸血的傢伙出現的時候發現它們根本就不怕的時候就會被蚊蟲活吞.
網路上盛傳的方法什麼蔴油啊之類的也都試過,但是效果都很有限.根本就是没效.蚊蟲先會在附近轉轉,然後就不客氣下來大吃.
有一天看到了一個有關飲食控制血管增生來防癌的TED節目,說到許多防癌的食品在混合之後效果不是相加,而是指數性增加,我靈機一動就把各種有點防蟲果效的精油混合,果然可以把防蟲果效延長數倍的時間.
記得古人用艾草防蟲.我為了吃綠蔴吉種了日本艾草,結果在菜園裏到處繁殖,變成多年生雜草.問題是我很捨不得除掉它們,只為了喜歡綠蔴吉….
有用艾草煮茶噴在身上防蟲過,有點效,只是會把衣服染得綠綠的.
有天,看到別人用油煎草藥,反正我艾草多得用不完,就拿些來煎蔴油.本來想要給老二擦皮膚的,結果他不領情.
用小火煎過蔴油的艾草葉上還有很多蔴油,我捨不得丟,就在出外工作前拿來擦皮膚,想說也許能驅蟲…果然有點驅蟲的作用…趕快加入已經加強很多防蟲果效精油的配方…結果用一次可以防兩個小時的蚊蟲…是我在大熱天,大太陽底下的結果…一般陰涼的地方可能可以更久吧?(歐護在這裏只能擋幾分鐘,而且用了之後不能用手去摘青菜水果.有打獵配方的歐護,40%的濃度,罐上說可以維持八個小時,在我的工作情況下至多兩個小時就揮發得差不多了.重點是…很毒!)
直接抹油在身上會油滋滋的很不舒服,我試用20滴油配7 ml的酒精混合用噴的,效果也很好,而且很省精油,問題是我這裏的純酒精得要去酒店才買得到,一般藥房賣的是有毒的丙二醇當消毒酒精,不合適用噴的,恐怕會吸入性中毒.
這次回台灣去儀器材料行找有蓋有底的試管,玻璃滴管等可清洗的容器來幫客人作單支護唇膏的時候看到了滾珠瓶,想來試看看這樣是不是可以不用酒精,又能少量抹防蟲油在身上.
果然可以!只要在在皮上劃幾條線再用手抹開就可以有同樣的防蟲果效.
所以話不多說,在這裏向各位公開我的防蟲防蚊配方,希望大家廣傳防止因被蚊蟲叮咬和登革熱…當然我的配方可以防的不止是蚊子啦…不過現在當務之急就是防蚊…這不像歐護是有毒的不能在室內使用,使用過也不需要用肥皂洗去殘毒…吃到是會有點辣,然後應該不會有人要拿去塗眼睛吧?肯定會刺眼的…使用滾珠瓶可以很精準地塗在耳朵,眼睛,嘴巴附近,也可以很方便地塗在頭皮上.
我的配方是小量的,要配大量請自行計算…台灣人的數學都超棒的說…
Geranium(天竺葵?) 5 ml
Citronella(香茅) 3 ml
Orange (柳橙) 2 ml
Rosemary (迷迭香) 1 ml
Peppermint (胡椒薄荷) 1 ml
Eucalyptus (尤加利) 1 ml
Lavender (薰衣草) 1 ml
Pine (松) 1 ml
Basil (羅勒) 1 ml
再加上等量的煎過生艾草的純蔴油,混合均勻就可以使用.
生艾草或剛乾的艾草拔下葉子來放進蔴油裏用最低温煎.台灣的瓦斯爐火力都太大了,可以用電磁爐來煎.份量我就没有計算了,因為葉子會吸走很多蔴油,我放了三滿鍋的艾草葉,每次都是能夠用力把艾葉壓進油裏的份量.最後不煎了是因為蔴油快没了.我想如果能找到低速離心機,可以把蔴油從艾草葉上離心下來,就不會損失太多蔴油了.煎艾草的時候煎到變色就可以撈起,所以還是建議用生的,或綠的艾草,就不會有煎過頭香氣跑光的問題.
如果能夠買到苦楝油,加點效果也不錯,只是苦楝油有大蒜味,願意像我一樣塗在身上的人要忍受別人異樣的眼光就是了.如果不在乎別人異樣的眼光,加入浸蒜的橄欖油也有效,只是那個味道就真的很不敢供維了.浸蒜要用玻璃罐裝滿一罐生蒜,加入橄欖油蓋過,放在陰涼處一個月,現在才開始做有點救不了急就是了.
希望用了有效大家廣傳,別讓商人趁火打劫,以防蚊之名餵給大家毒藥…
通常我一個人這樣的份量在大熱天大太陽下可以用超過一週.是用一滴一滴的很浪費也很油,滾珠瓶才啟用,10 ml 的小瓶子不知能用多久,只好請大家自行去試用計算了.
歡迎大家轉發,不用再通知我借用等等…
補充:(9/3/15)
今天試用滾珠瓶上防蚊油後下田,效果比直接滴油的差。可能因為用量少很多的緣故。有效時間只有40分鐘。

Edible Bug Repellent

12265671_1644542495800505_4108671854975327795_o

I may not need a poster like this for my craft show booth, but I put this up anyway. When telling customers what I will do  put pressure on myself . Good thing is, this prevents me from procrastination .

Living among naysayers, I am constantly discouraged from ideas that they are not familiar with. So this serves as a pushing force that something must be done this year.

In the past it either was the weather or the biting insects that kept me from working in the yard. I can beating myself  to endure heat or cold, but for those living beings which want to eat me alive, is a different story.

Methods I’d tried and problems with them are:

  1. Homemade herbal tea spray: works about half hour, the tea can stain clothing.
  2. Make veil to cover my head : can’t see very well, hot and humid insides.
  3. Put on long-sleeves shirt and pants: become unbearable when temperature soars above 90’s or 100’s. Black flies can crawl inside clothing, and mosquitoes can pierce through jeans.
  4. Use essential oils: effective for 1 and half hours, but if I want to work outdoors longer, I need repeat applications, and the more I put on my skin, the more greasy I becom
  5. Using DEET Products: The regular concentration is effective for only 10 minutes, the deep wood concentration works longer, about 30 minutes, while the most concentrated , almost pure DEET works about 2 hours instead of 4 hours, which is stated on the package. Need to use soap to wash away from skin once indoors.

Once I stocked many bottles of DEET products when they were in clearance sale. It was before my attempts to make my own. One thing kept nagging inside was that I must wash it away when I am indoors. What’s wrong with this product that I must wash it away once indoors? Is the fume toxic? I didn’t really make any study about it. The fact that I must use soap to wash  DEET from my hands before eating already tells me something: it may cause health problem if I ingest some.

DEET is not smelling much like most essential oil. From the on-line research I found it an anti-feedant  of mosquitoes. Maybe there’s something about mosquitoes’ taste.

When I was in college studying  entomology, one day I had a lab with house fly’s taste. The teacher instructed us students dip tooth picks into molten bee wax, then use them to stick to the backs of house flies which were kept immobile with icy water bath. The tooth picks with flies were inserted to a block of styrofoam. Then the flies were unfed for a day before testing. We used cotton swabs dipped with different solutions to test the flys’ tastes. When moving the dipped swabs near the flies, their proboscis would stick out, trying to eat the content from the cotton swabs. Of course we shouldn’t let them taste any, for we wanted to keep them hungry. Water and sugar solution  caused them whole-body violent motions to stick out their proboscis, while table salt solution did not cause much motion. The flies seemed able to taste the solution from the air.

I do believe mosquitoes have taste preference and I am working on it. This could be a Ph D. thesis if I studied in graduate school. Degree is not my purpose, I just want to find something useful . ( I will consider about it if you offer me scholarship and equipped labs to do this research for my Ph. D thesis, though.)

Everything that people said useful I am trying.

So far I found that fresh herbs are more potent than dried herbs. I doubt that mosquitoes hate bitter taste, so I also tried dandelion. Maybe my methods for extraction did not fully extract the bitterness out from dandelion, and I found it not working. Obviously not every bitterness works.

I  put some extract on my dog yesterday. Today to my surprise there’s one black fly bite under his chin. A deer tick also attached very closely to his lip. Without repellent or with ineffective repellents, black flies and ticks like to bite on the back of his neck or head. His belly and legs are also favorite targets of black flies. You will see bloody target-shaped biting sites. But, no, there’s no biting signs on those favorite sites. Maybe they found some places that I missed. My dog hate the smell of essential oil. When I put  essential oil on him then bring him out, he will surely try finding some freshly made chicken poop to roll on. The one I put on him yesterday contains very little essential oil. in 7 ml extract I put only few drops of essential oil mix. So the smell is not very overpowering.

When equal volume of herbal extract and essential oil mix  in a 7 ml roller bottle ,it can last me and my dog for a week.  Unless I wash with soap, the repellent stay effective. Maybe one application can last as long as I don’t wash it off. I should find it out. It will be like a dream if this is true.

The problem now is that the herbal extract is very green. Though using roller bottle does not apply much extract unto skin, I still hope to remove chlorophyll from my extracts. Hope I could remove chlorophyll from the extract and concentrate the extract more, maybe with some simple chromatography… maybe I should apply for a graduate school for this…

Still I need scientific data to support my finding. Putting repellent on my skin then go out to work and count biting free hours is not very convincing. I need to collect feeding data. To this , I need to raise virus free mosquitoes, design feeding station, and design methods to count feeding. But that is after the under deck enclosed and waterproofed.


Test Your Homemade Soap with Herb

You carefully measured, mixed, and crafted your soap.You waited for 3-6 months for your soap to cure, or you hot processed it. All these are for one thing: you want your soap to be neutral, that it will be kind to your skin.

When there is excess alkali in the soap, it will eat away your skin. I had the first hand experience of it. Years ago when I studied in  graduate school, I did lots of experiment to extract DNA from cells. The chemical I used in the lab to  extract DNA was the lye soap makers used to make bar soap. When adding lye solution to a test tube containing animal cells or other organisms, in seconds the solution would turn to a sticky mass of exposed DNA. Proteins, lipids, and other cellular materials are either dissolved or reacted with lye. I’ve seen people refused to wear  lab coats and got lye on their skin accidentally . Their skins first discolored, then days later holes appeared and you could see something raw in that hole. Using soap containing excess lye is not good to skin at all.

If sharp pain occurred when using your home made soap ( or the soap you purchased from other soap maker), or your skin becomes dry after using your soap,  you should suspect that the soap is not neutral.

There are other signs that soap contains excess lye:

  1. It sweats.
  2. Your cellulose sponge deteriorate unusually fast when used with your soap.
  3. The enamel of your bathtub or sink etched without known reason.

When the last thing happened, using a non-neutral soap is not just the matter of skin damage. It  may cost you the price of refinishing or remodeling  your sink or bathtub.

The following are steps to test your soap with roselle tea. The part used in the roselle tea is the calyx of a plant Hibiscus sabdariffa in hibiscus family. You can purchase it from most oriental grocery cheaply by pound, or other nature food stores. If your herbal tea bag brews a tea of red or pink color, you can check the ingredient to see if it contains hibicus, which actually is roselle.

  1. Brew one whole  dry roselle calyx in half cup of boiling water for 5 minutes. The color of the tea should be dark red.
  2. Dissolve pea-sized soap in 1 once boiling water to make soap solution.
  3. Pour a tablespoon of roselle tea to a white bowl.  Add 1/4 to 3/4 teaspoon of your soap solution to the bowl. Watch for the color change.
  4. If your are in the process of making soap, dissolve  pea-sized f your soap paste into 1 once of boiling water. Pour 1 teaspoon of roselle tea directly to the soap solution. 

How to read the result of your test:

  1. Pink: congratulation! Your soap is neutral and won’t eat away your skin, enamel of your sink or bathtub, or your cellulose sponge.
  2. Purple first then turn back to pink: no need to worry about your soap. Sometimes even the purified water have this result. If your water is not distilled water, the minerals in the water will react with roselle’s pigment. Be sure when you boil your water, discard the water which was stored in the teapot and use fresh water.
  3. Blue or purple blue: do not use! The soap contains excess lye and is not safe to use.


What to do with the soap that contain excess lye?

If you are hot processing your soap, you may add more oil to cook, or stir in 20% citric acid, 20% boric acid, or 33% borax (all are dissolved in pure water) to neutralize the soap. Stir and cook your soap for 15 minutes then test again, until the test result shows that your soap is neutralized. Sample soap from different places of your pot to be sure that the whole batch is completely neutralized.

If your soap is a cold processed one,you may  remill and superfat  your soap .Test again after cooking your remilling soap 15 minutes. Add more oil to cook until the test result shows that your soap is completely neutralized. Start by adding 1% of oil called for the cold process recipes. Sometimes the recipe just reflect the general guide of certain oil. The composition of oil may change due to different varieties, or growing condition.

Overview of how to make neutral soap

If you find this too troublesome, and just want a bar of good soap,  you may purchase soaps from my etsy shop.


From the View of Pest Management: Why Am I Not An Organic Farmer

I was very excited seeing organic produce in  grocery stores at the beginning of this century. I had tried growing some myself. I even called overseas to my old school professor about what organic products to use to deal cut worms and others before internet was available. Organic farming practices were once my hope and light.

When encountered pest problems in my garden, all I thought was how to eradicate them, like what I learned and been  inspired in my college years.  I ‘d studied  insect classification, physiology, pathology…economic insects, insect toxicology, hygiene insects,… etc.  Just look at what I’d studied should give you  ideas why people study entomology. I didn’t remember any professor had shown appreciation of pesty insects and other arthropods other than how to control or eradicate them.

So I inherited the hate of so called ” pests” to start my growing experience.  When aphids covered my leafy greens I would brew something to kill them. I was proud that I did “pest management” organically, until one morning.

It was after rain and I found a herd of aphids on the greens. I quickly mixed a bottle of garlic soap spray to the garden. Ladybugs were already feasting on those aphids, but I just wanted to see  aphids drop fast. After spraying the aphids, I stayed to watch the effect. To my surprise, most of the aphids remained like nothing had happened. Only ladybugs stopped feeding on them. I like ladybugs. In my  freshman year of college they were my case study. I strolled in the campus daily to find aphid- covered plants to bring back to my dorm to feed them. When aphids were available ladybugs would eat one after one without stop, and they chewed aphids fast.  When ladybugs  stopped feeding on aphids I felt sad. I decided not to use any garlic spray for aphid problems. I’d rather wait to see if dear ladybugs would find those delicacy to dine and breed nearby.

For many cases of aphid infestation, ants were nearby. They move aphids around. I hate ants in the house, and I also hated ant in the garden, just for the facts that they herd aphids.

At the old place the landlord let me have a garden plot. I once set many cement boards as stepping stones. Sometimes I moved those boards and found ant nests underneath. Later I found, under every cement board there’s an ant nest. Since I stopped spraying aphids , aphids were not problems to me at all. Instead, they were my calls to the ladybugs and lacewings. All the sudden aphids disappear totally. So there’s no reason for me to hate ants in the name of aphids. I wasn’t sure what to do with those ants and their nest. Maybe ant were good in someway.

The old garden the landlord allowed me was right under a huge cotton tree. Every time I watered I could see the soil became dry again in minutes. One year I decided to dig the site and laid plastic film to stop the tree from grabbing water. It worked but had a problem: slugs loved to gather under the exposed plastic film. They gathered from around lawn to feed my vegetables. So I had to hand-pick slugs from every exposed plastic film and gathered them in quantities.

One day new problem emerged. Some animal found my garden vegetables and was constantly picking and discarding half-eaten peas, beans, and tomatoes. I soon found  a nest  of 9 naked mice in a straw ball under the plastic film. The mother would dart out from the site when I check for slugs in the garden. At beginning it was cute to see those new born mice, and I allowed the mother mouse to eat in the garden. Later I was afraid that mice would become big problem when they all grow up. So I stole 4 babies to raise at home, hoping to have some tame pets for the children. The stolen mice suffered from the formula we fed . Gas bloated in their transparent belly and they died one by one. The nest in the garden did not do well, too. One day I found few ants on one of the remaining baby, gnawing the baby’s eyes. Later that day when I checked the nest I found more ants gathered. The baby bitten by ants died, and the mother mouse discarded all her babies. Later all babies were eaten by ants.

When doing composting in the garden, many species of flies appeared. I didn’t know what they were, only that they belonged to  diptera. Poor entomologist was I. Some of them were a little bigger than fruit flies and had pretty metallic exoskeletons. Blue, green, orange, and gold. Sometimes tiny  maggots crawled on vegetables. One day I saw  an ant lifting a wiggling maggot in its mandibles. That settled for the ants. They were not bad at all if they had other food options , I guess. When all the aphids were gone, there must be other ways for them to survive. I had no idea what kind of maggots I had in the garden. Sometimes I saw maggot eating other maggot.

For a time I hate robins. They eat earthworms, and steal strawberries. When I began to have strawberries I used to see them almost ripe and the next day they were pecked. The birds I saw in the strawberry patch were always robins, so there’s a reason for me to dislike them. Plus earthworms are my darlings. Maybe other birds ate my berries, but robins were too dumb to be seen in the scenario, so they got the blame.

I  didn’t use any killer in the yard. No pesticide, and no herbicide. The first year in the new garden of my own I only harvested 2 edible strawberries from the  berry patch.The second year I put net on strawberry and found it bothersome. Still I didn’t get many berries despite I protected them from the birds. I excluded birds but others chewed on my berries under the protection of bird net. The third year I gave up protecting strawberries, but had more than enough of strawberries. Children stopped helping  picking strawberries, for there were too many to pick.

Birds had stopped eating strawberries. Robins still hop in the yards and garden. I don’t set bird feeders in the yard but the yard is full of  birds. The deck  near the garden has nests filled with different sizes and colors of eggs on almost every corner. Under the yarrow another bird nested with speckled eggs. One day the dryer took forever to dry laundry and we found a nest with eggs in the vent. Even a discarded planter in the weed got its bird tenants. There’s must be plenty of food for those birds, and they don’t need to steal my strawberries.

The first year growing in my new garden had all kinds of pests and disease. I had to pray about to do anything or not to stop the problems. Finally I calmed down and decided to give nature a chance. So pests occurred one year and disappeared totally the next year without me doing anything. So do the diseases those pests brought. Every year new species of insects appear in the yard. Sometimes I had to ask help from my fellow college classmates on Face Book to identify them.

1271681_543891345679949_780695850_o

Mantidfly looks like wasp with mantis’ grabbing legs.


These observations told me that if I  allow nature to do their works, I can coexist with nature, and still get to eat. I  need to be more patient and wait for the nature to replenish workers for me. I love those nature workers and they need to eat, too. If I deprived  workers food by spraying, even with organic certification allowed killing agents, the workers will turn to my crops to fill their tummies.

I hesitate to   apply for organic certification for years. The place and the food I grow in it certainly can pass all the tests. The problem is : calling it organic is misleading and insulting. The organic farming ( gardening) practice and the conventional methods all have the same  philosophy , approaches, and purposes. The difference is the materials it uses. When applying a nature pesticide  to the crop, the damages to the ecosystem is not less than synthetic ones. Maybe the agents are more biodegradable, or less toxic to human, still they pose tremendous harm to the entire ecosystem. Fish and honeybees are victims to many of these organic killers.

And yet I haven’t considered every sector of ecosystem, and the interactions among them. Just from the view of pest management convinced me not to practice organic growing methods, even I had a bachelor degree in entomology. Later I learned more from the management of soil and decided to switch to nature farming. That will be another blog post.


“Farming the Woods” Book Report

519fg2b9ssml-_sx390_bo1204203200_


From many foresting farming books this book  is the newest one I could find from the  local online library.

Another reason for picking this book was, the title does not narrow to a specific type of utilization.

I  had read other books related to using woods, like Edible Forest Gardens, which focus mainly on growing edible products.

I have plenty of space to grow food without the space of woods. What I am interested is transforming the backyard woods into something more interesting.

The previous owners used the woods as landfill. I feel so sorry for all the living beings in the woods.  With  expectations in my head I started reading Farming the Woods: An Integrated Permaculture Approach to Growing Food and Medicinals in Temperate Forests, and found myself in  written academic symposium, the kind of meeting which gather s researchers to give talks in related areas from different aspects for several days.

Lucky me. These days so many resources just give you the conclusion without any scientific data to support their views.

I endured  the formal, academic introduction of foresting farming, and learned important terminology, which repeat throughout the book . I didn’t remember all the abbreviations, and needed to go back to the beginning to find the definition of certain capital letters.

Well , I can read documents like that. I used to work in lab and was accustomed to read research publications. Good thing about this format is : it’s point out the importance first then gives you evidence .

The history of how people utilized forest in the past follows the introduction. Though most people viewed forest as source of lumber and fire woods, there were people who did some management to bring out the dynamic and potential of forest.

Following the history are  changes of climate and  impacts on the temperate forest. This chapter collects many  valuable climate data from government which I was not able to find from online search in the past. The change of climate also change the composition of forest, which gives me ideas what would likely to success in the future.

Then the introduction of many NTFP are more interesting to read about. Guess you don’t know what NTFP is. I didn’t when I put this book down for few days, and needed to flip back to find out what it means. It means Non Timber Forest Products .

NTFP can be anything you grow in the woods. It can be nuts and fruits; mushrooms, ginseng, or other medicinal herbs; livestock pastured in the woods; or potted plants grown in the deep woods nursery. Basket woven from the wood strips and other arts crafted from the woods are also counted. To me this is just like all other life style. The difference is the resource. The book surely widen my world. If I lived in the woods and  everything I need I have to find in the woods , but  I saw only trees and brambles, whether they be alive or dead, standing or lying,  I probably would see the woods more valuable than timber and firewood.

To almost every NTFP, the author used a chapter to describe its general methods, the market potential, and case study. One thing I appreciate very much is the  spread sheet of  investment and income of various NTFP in some case study. These sheet can prevent  zealous investors like me from plunging into those high capital , labor input but  low even negative net income  NTFP. I also appreciate the evaluation check lists to help me determine if my woods is suitable to grow certain crop, like ginseng.  After the self – evaluation , the top crops in my heart, ginseng, turned out to be a big No-No.

Following NTFP there’re chapters about wood products and livestock in the woods, and how they can be integrated with other NTFP. Finally there’s  chapter about design and management. Until the final chapter did I realize the necessity of  detailed introduction of  all aspects and area of utilizing the woods. The woods is a complex ecosystem and we should not treat it as  mono-crop. Not every area of a woods is suitable to grow fruits, nuts, mushroom, ginseng, or timber.  A forest is not just a store that we take things out, it’s a place that I want to enjoy, too. I can’t wait to explore my woods when the snow thaw after reading this valuable book : Farming the Woods: An Integrated Permaculture Approach to Growing Food and Medicinals in Temperate Forests


Winter Chicken Run

IMG_1063[1]

I really want to have something fresh to eat from my own yard during winter.

Two books set my heart on fire.

First book was The Winter Harvest Handbook: Year Round Vegetable Production Using Deep-Organic Techniques and Unheated Greenhouses .

The second book was Four-Season Harvest: Organic Vegetables from Your Home Garden All Year Long.

By that time I only had  rough ideas about my future. It related to safe food and self sufficiency, so I thought maybe I would do organic farming. ( Now I do nature farming, which has higher standards than organic farming. I’ll explain this in future post.)

I started with PVC pipe mini-tunnel. At the beginning, I was very satisfied with this simple, low cost construction.

I moved out all the plants I started from the house to the mini-tunnel. Milk jugs were filled with water to use as heat sink.

Just few days later, a storm brought 6 inches snow, and this mini-greenhouse almost collapsed. 935047_477712538964497_1893747836_n

Later an ice storm completely distorted and collapsed the PVC pipes. I had to hurry to move back all the survived plants indoors again. Sometimes we had heavy snow or ice storm even in May.

After many struggles, I finally bought EMT conduits to use as tunnel hoops.

I got the benders before our move. The reason I didn’t use it was I doubt my own ability to bend metal tubes. After bending my first EMT conduits, my fear of failure dissipated. I bent enough hoops to mark the planting plots for next planting season.

The first user of the tunnel was not overwinter crops but  our pet duck. Early spring ice storm brought heavy caking ice. It was almost impossible to remove those thick caked ice from the structure. So few end hoops was gone under few feet of ice.1507769_581447055257711_144731179_n

The following year before halloween, the chicken moved into the tunnel.

One day our neighbor’s wife went to delivered her baby. Their cattle dog and cats all wondered into our yard. The dog saw something moved in the tunnel and forced his way into the plastic and began to chase chicken. One chicken was bitten and died before we got him out.

I had to reconstruct the tunnel with chicken wire to keep our young hens safe. In the cold I managed to tie chicken wire onto hoops, then covered the tunnel with greenhouse film. The whole tunnel was 90-foot long. I didn’t have enough chicken wire on hand. In the store there’s no fit width of chicken wire, for it is out of season. I had to splice different widths and lengths of  chicken wires together to cover the whole tunnel.

Good thing for the wire is, it keeps the plastic straight! Sweeping snow and deicing are also easy. There’s no more film sagging!IMG_1043

Some animals tried to get into the tunnel by chewing holes on the plastic film, and even chewed few plastic ties. The plastic film had many large holes on it.

IMG_1067

Greenhouse film is expensive and I want to use it as long as possible. The supplier Johnny’s Selected Seeds told me that most of their customers use the film for only two years then discard it. 

One thing I hate is putting plastic into trash. Especially this big piece. How long will this big piece of plastic disintegrate in the landfill? I recycle every household plastic packaging materials, even cut out labeling stickers, wash all the plastic food warps , and dry them before putting them with  plastic grocery shopping bags to recycle. I gave up disposable female products and use washable infant diapers as pads.  I do all these so that this place I live, though  not my own country, can be as clean as possible.

Though bitten throughout the whole length, the film still keep the tunnel warm. The problem with the whole piece is its difficulty to access the inside .

I tried tying parachord  unto the hoops to straighten the film and help to  keep the film from sliding when lifting the film,1467332_570230976379319_1876437197_n.jpg

but it is not possible to just lift a little length of plastic to get into the tunnel. You need to lift considerable length of plastic to get enough opening to crawl into the tunnel. Another problem is , when the sunshine is bright, and you wish to ventilate a little bit in the cold winter, the wind can cause severe problem. Lifting a little of the plastic easily make the tunnel into a giant kite. Needless to say, I lost some hoops due to this kite. With wind the giant kite pulls out hoops from the soil and bends hoops and purlin  into odd shape easily.

The holes made by animals (probably  squirrels ) gave me reason to cut the film into pieces. I figured that I could overlap pieces to make doors and ventilation shutters.   I can open just a little of the film to ventilate the tunnel or enter it. The 100-foot long film was cut into 15 and 25 pieces, and I overlapped pieces at the joint.  When I need to open a flap to ventilate the tunnel, even with the strong wind, the tunnel will not become a giant kite, for air passes out from  overlaps quickly.IMG_1059

For this  I need more  PVC clasps ( I got those from Johnny’s) .Later I found out that I could cut PVC pipe to make my own. The homemade ones need filing , though. I use metal clasps as stoppers, that I can lift up the section I want to lift (clasped to a piece of straight EMT conduit) and rest it on the clasp to stop the “door” from falling.

So the chicken live in the tunnel for the winter. 4 chickens consumed every green in this 90’x 6′ tunnel just in one month. Here is the video when the temperature was above freezing, that you can see chickens from the outside.


Into the Woods

519fg2b9ssml-_sx390_bo1204203200_

I’ve been idle for a long time…since the ground froze hard.

This year I plan to clear the accumulating dead wood from the woods.

The woods probably served as trash dumping site for previous owners…I’ve seen so many household items that I haven’t seen in years. You probably need to find same items in antique shops today. Old tin wash basin, buckets, and other household items I used in my country when I was very little, before plastic replaced everything, cluster at the border of southern site. Bricks and part of  cement fire place chimney or parts of brick oven, I can’t tell, piled at the northern border of the woods. Other site near the trail to the woods piled construction lumbers,  5- gal bucket filled with harden cement with a wooden post, composite deck boards. Away from those big piles trashes scatter here and there…coke cans, faux leather football, BB gun bullets, styroform utensils, plastic forks…etc.

Sigh!


Not everyone views the woods as treasure as I do.

In the fall of 2014 I tried my hands on Hugelkultur. A 4 x 90 feet  German style raised bed  or mound was constructed with dead wood , fallen leaves, and soil. I planted garlic before the soil hardened.

I first read about it in Gaia’s Garden: A Guide to Home-Scale Permaculture  before the reality of owning a plot myself came true. Later I was looking for examples of desert forestation and found people using it.  Since forestation desert is my dream, I want to try it.

The hugelkultur worked like  charms in 2015. I didn’t water it at all. The scattered mustard green seeds  grew to maturity and reseeded themselves, brought a bounty harvest of mustard green for me to pickle into 2 packed 5-gal bucket Chinese style sauerkraut. I didn’t notice the activity inside the mound when I harvested garlic. It was a hot, dry August morning. After that I went away for 2 weeks to stay with mom and dad in Taiwan. When I came back, the mound was almost the only green thing in my yard. In this area of Wisconsin, we experience almost 2 months of dry spell every year. Except for those who water their lawn and garden,even the farm, dry golden parched land rules.

Yet in my garden, a green island existed, the experimental hugelkultur.

When rain returned month later, I planted garlic chives on it. Fun thing I’ve never seen before was, whenever I poked my dandelion weeder into the mound to make a hole for the slender chive division, worms squirmed out from my poke or nearby soil. What a sight! Earthworms are my love since my childhood. I even have a worm bin to raise thousands indoors. I’ll manage to write about them when I get time.

While digging soil to top the pile of dead wood, I came out an idea: why not build  parallel hugelkulturs and set low tunnels on tops? I measured the height from the bottom of the mound to the top of a hoop I set on top of the mound as a model and found it about 5-foot tall. Just bend a little I could walk under the hoop.  On the level ground, I need to squat and waddle in the low tunnel to move.  This solve the problem the development covenant brings. I can’t build high tunnels or greenhouse in my property due to the covenant, but I can have low tunnels, the raised low tunnels. I showed this idea to the development owner, and he was speechless.

So this year, before the serious planting season starts, I mean, before buying seeds and planting them for the growing season of 2016, I did some planning.

I want more hugelkulturs this year. This means I need to gather more dead wood from the woods. I used all the dead wood near the entrance of our wood, and need to go further into the wood. In order to reach those dead wood, I need to cut out trails to work. The woods has more potential than just fire wood. Maybe there’s some resources about how to manage the woods to bring out its potential.

The newest book I could found from the local library network is Farming the Woods: An Integrated Permaculture Approach to Growing Food and Medicinals in Temperate Forests

I am in the middle of this book, and already I am shopping at theBadgersett Farm it introduced: zone 4 hardy hazelnut, chestnut, hickory trees, and mushroom spawns from a Wisconsin grower(Field and Forest Product). I am tired of planting nut trees from many other sources and found them dead after severe winters. In the books I found this nature farmer who breed nut trees in thousands for zone 4 hardiness, blight resistance, bigger nuts, and ease of machine harvest. Sounds too good to me. ( He started as research projects for university, so he need not to depend on the income of nut harvest.) I go nut for nuts, for I don’t want to plow a field every year for  starch, protein, and oil crops. Their customers even have success planting their zone 4 nut trees in zone 3!

The draw back of this book is, it uses abbreviations too often, that I need to go back to the beginning chapters to find the definitions to understand the concepts.

I’ll write more about Farming the Woods: An Integrated Permaculture Approach to Growing Food and Medicinals in Temperate Forests  when I finish this book.

The book review is here.

When Disaster Strikes

It’s must be God who constantly inspires me to research and start projects.

Long before my family moved to this place, I knew we would move to the country one day. I grew up in the country, and have the first hand experience about the terrible country smell. I knew in the country, there is no sewer system. Country dwellers must use septic system, which is not environmental friendly. I can do cleaning without toxin ladened cleaning products, but I can’t help with  human waste.

My grandparents on my father’s side lived in a Japanese style wooden house. Human waste fell from the squatting toilet closet to  a storage pit underneath, the same height  as ground level, which was enclosed as part of the house. Grandma would open the access door on the wall of the house and used a long handled ladle to ladle out the content from the pit to 2 wooden buckets, then carried the buckets with a bamboo stick yoke to a nearby cement pool in the midst of rice paddies to dump. Sometimes she scooped out content from the cement pool to fertilize her vegetables..

My family’s toilet in my childhood was not as convenient as grandma’s. The collecting pit was underground. Most people’s toilets at that time had underground pits. I only saw it got suctioned once. Imagine how terrible the smell was! The toilet “closet” was attached to kitchen. One day a mouse got into the pit then feasted in our rice storage urn. Mom and dad washed the stinky rice over and over again,trying to remove the smell  without prevail. Finally they discarded the whole urn of rice.

Before moving to the country, beside farming, I thought about the need to treat human waste properly. I began to study constructions of septic systems, outhouses, and composting toilets. I  liked the idea of composting toilet very much, for water is a precious resource. Using drinking and washing water to flush toilet is  wasteful to me.

When comparing the designs of composting toilets, I found them treating waste not much different then the ones I encountered in my childhood. Most of them just accumulate human waste and have fans to draw out smell or dry the waste to solid for further disposal. I also viewed many youtube videos about composting human waste. Some just collects human waste in plastic buckets then leaves the buckets and all at a certain site. Some  uses plastic bags  to line up buckets and collects waste, then dumps filled bags in the farms.  They called these “Composting”. I’ve seen videos showing how to make composting toilet seat to fit with 5 gallon bucket, and how to dry flush with peat moss or saw dust, still I had lots of doubts about the way people do after their buckets are full.

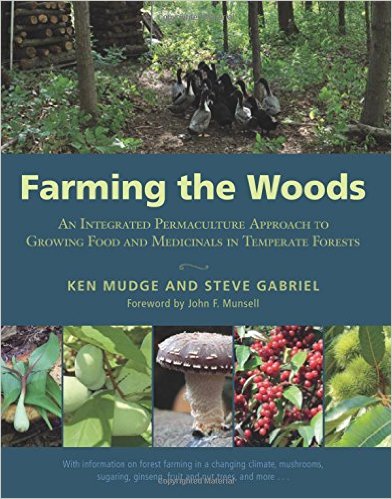
One day I read a book called The Humanure Handbook: A Guide to Composting Human Manure by  Joseph C. Jenkins and was very pleased with the book.

The book have many comparisons among methods used to treat human waste in forms of charts, backed by many published research papers and research institutes.  In that book you can find

  1. methods  people used to dispose human waste in the past, or in undeveloped countries today.
  2. methods people used today  in developed country to treat human waste.
  3. analysis of the products of each method and problems in each methods.
  4. pathogen contents and mortality time tables ( or survival rates) in different treatments.

What surprised me was : neither the sewer treatment nor septic system  can destroy common human pathogens or parasites. Yet after short term hot composting or long term cold composting, researchers couldn’t find viable disease causing bacteria, virus, parasites , or live eggs.

In The Humanure Handbook: A Guide to Composting Human Manure, the author introduced workable ways to collect  and compost human waste. Other than the concern of diseases, the author stressed that his method does not smell. I believed it based on my experience of composting my own kitchen and yard waste and wanted to give it a try.

Everybody in my family thought I was crazy. Husband refused to get those 2 for $5  on sale 5 gallon plastic buckets. He was so mad at me and accused  that my experiment  would cause financial crisis to the family.

In 2013 Christmas, the whole family went to Taiwan to visit relatives. My husband teaches in a university and have a J-term course for students to study in Taiwan for a month every year. My children and I only stayed in Taiwan for 9 days, then came back the the State. Husband and his students stayed in Taiwan and returned before next semester started. That winter Wisconsin experience severe arctic vortex. The temperature was much lower then usual.

The third day of our return, I did many loads of laundry. Kids all went to public school that school year, and the school just started. Near noon a sudden strange alarm startled me. I hadn’t heard that kind of sound before and couldn’t figure out what it was. I dialed 911 and asked for help. The lady at 911 said it probably was the alarm from sump pump and sent a police officer to my house. He quickly found the alarm, turned it off, and suggested a septic service. Though we had our septic tank pumped that summer, I called the service.

An old gentleman came and waddled in  snow with a big pipe to  pump out content from our septic tanks. Later he asked for hose to flush the connecting pipe. I showed him the hose and went back to the house. Few minutes later he came to me and said the connecting pipe to the big tank was frozen.

In my panic I asked him what to do .  He said there’s nothing we could do to thaw the frozen pipe. We had to wait until spring to use the septic tank again, which was 4 months later.

He told me what people do in this situation, which is not uncommon in this area:

  1. Hire septic service when the sump pump tank is full again, which is expensive ($375 each service).
  2. Rent  johnny.
  3. Go potty in the yard.
  4. Go to coin laundry to do laundry.
  5. Use very little water. Don’t cook or wash in the house.

I could do laundry in the coin laundry, but other suggestions were not possible. I don’t want to go bare in this severe cold, especially at night , not even in a johnny. I can’t stand the smell of a johnny, too. Coyotes howls at night from time to time in our yard. Sometimes they fight loudly. I don’t want to encounter one.

Then I recalled this book  The Humanure Handbook: A Guide to Composting Human Manure and hope rose.

I got an 5 gallon plastic bucket which was not in use as  a temporary potty then put in 1/4 bucketful of peat moss . I looked at the classification of local free newspaper and found a nearby farmer who had square hay bales for sale and could deliver them to my house. That day I brought kids to Burger King for dinner, then went to the same home improvement store to buy more 5-gal plastic buckets and peat moss bales for dry flush.  The next day I constructed composting site under a discard duck coop with a layer of hardware wire to prevent rodent, a layer of plastic sheet to prevent leaking,  a layer of hay bales, then build walls around the hay bales with more hay bales. Husband was far away in Taiwan and couldn’t help or stop me at all. I got dish tubs and stoppers for kitchen sinks from the store. By using my home made soap we didn’t need to worry about residue of soap or pollution of waste water on our lawn. I carried 2  5-gal buckets  of waste water to the yard at a time then dumped  waste water far away  to prevent ice near the house. In bathroom I got a rubber pig feeding tub to catch shower water from Tractor Supply Company in town. Shower curtains were hung around shower stall  to direct water into the feeding tub. After shower, the water was used to hand wash clothing, then was scooped out to 5-gal buckets to dump in the yard. I put big plastic tubs in laundry room to catch water from water softener. When the water softener flushed,  water was scooped into 5-gal buckets then carried out to  dump in the yard.  I then hurried back to catch more flushing water. One flush of the water softener takes about 16  5-gal bucket loads.  Sometimes in the midnight I heard the water softener  flushing, I sprang out of bed immediately, put on clothing quickly, then raced with the flushing water in the deep snow. In order to dump water far from the house, I need to shovel out paths after each snow.

My second son and I built 2 wooden toilet seats to house 5-gal buckets to use in bathrooms.  The buckets was filled  with  1/4 bucketful of peat moss before use. After each use, we scattered in a cup of peat moss to dry flush. It does not really flush. To be more exact it covers the wet content we just disposed in the bucket. This did remove smell from the bathroom, and we used these toilets until the earth thawed.  One bucket was needed a day for our family of 6. When a bucket was almost full, I covered it with a lid and stored it in our laundry room. When the last empty bucket was put to use I carried all the full buckets to the composting site with a toilet  bowl brush, a flower watering can filled with hot water,  dumped the content onto piled hay and washed the buckets, then dumped the waste water onto hay pile. After all the buckets were emptied and cleaned, I covered the pile with a layer of dry hay, which removed the smell quickly from the air. The washed buckets were aired to dry then brought back to the laundry room to store.

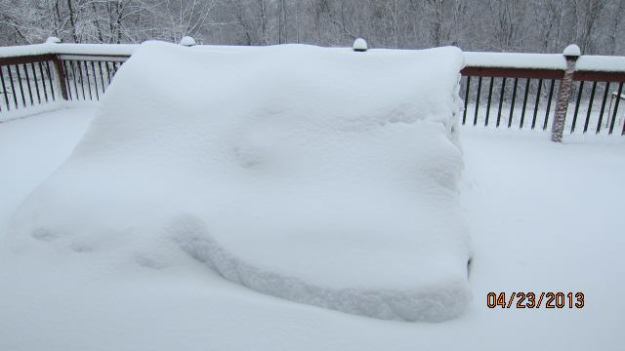
I started the composting site in cold winter,  the content didn’t get composted right away. Instead, it froze. After several dumping, less than a month, the site was full.

Digging out Composting Site

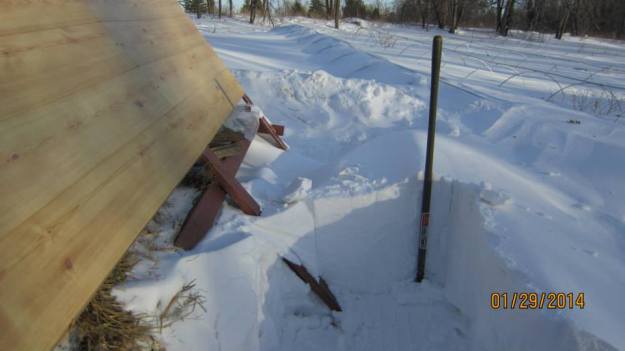
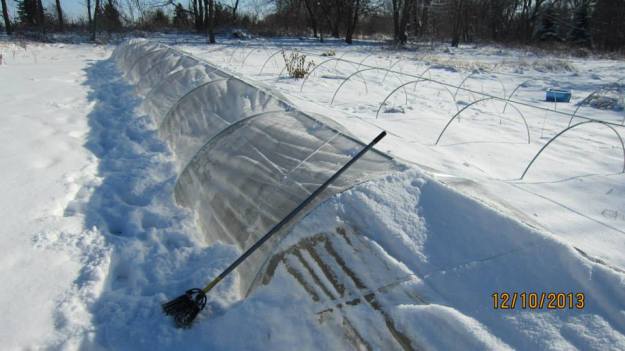
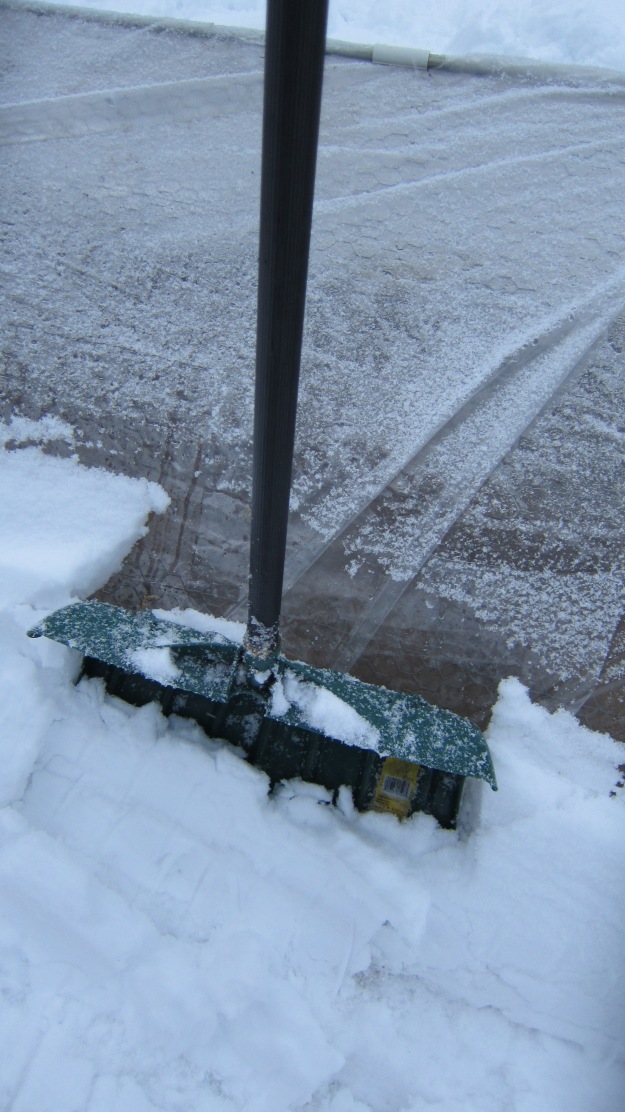
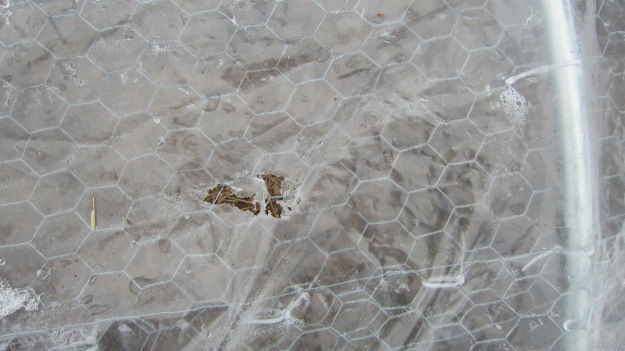
I had to find another composting site. This time  only  under deck where little snow accumulated was available. I went to home improvement store to buy more hardware wire , concrete reinforcement wire, and tarp to build the second site.

I was the only one who did all the composting and water dumping. Husband said he didn’t know how to use little water to do dishes and refused to help. He did not want to involved in composting , so he peed in the yard.

In the following winter, the septic pipe froze again. This time we were not as panic as previous year. The  system was set up again in one day . We still cooked and washed in the kitchen, showered and laundered in less wasteful way, for waste water bucket was heavy, and I carried two buckets to dump at a time. That year my husband finally helped. Sometimes he carried waste water to dump and dumped few buckets of humanure.

During summer the compost pile composted and the volume reduced greatly. When the pipe froze happened again, I didn’t need to construct a new site. The pile was alive, it composted in the cold.  I found wood fuel pellet worked better than peat moss in absorbing liquid, so instead filling empty bucket with 1/4 bucketful of peat moss, I used fuel pellet. It costs less than peat moss and  smelled better. We didn’t need to dry flush each time unless we needed to cover stool. This made the bathroom less dusty, too.

This year we had our septic pipe reinstalled and insulated. The contractor advised me to cover the site with one inch of hay. I did what he said and covered the site with an used greenhouse film. Hope we don’t need to use composting toilet , or refrain from using water this winter. I am not against of these methods, the problem is , I am the only one who struggles to solve problems. Life is hard with this kind of partner, who leads the whole family  against me. Still  life proved that we need to be self sufficient in every way, including knowing how to go potty.

Homemade Neutral Soap

My first soap was made with my mom’s fry oil with  NaOH dad got for his shop after some theory I learned from high school chemistry course. That was in my senior year of high school, long before I got married and have children with eczema.

The mixture settled  to two layers: oil on top and soap on the bottom. It was mixed without accurate measuring. After pouring out the top layer oil I got a very alkalinic soap to do the dishes, which was my main chore of the house in high school.  Compared to  store bought dish detergents, I was very satisfied with my crude soap though it was harsh on my skin. Mom complained that I used up her fry oil, which she used repeatedly and the color was very dark after many uses.

Years later I have my own family and have produced used frying oil as well. I do not reuse fry oil like mom did. I found that:

  1. Food tastes best with fresh fry oil.
  2. Used oil tends to cause blister in mouth, sudden acne, or nose bleeding.

There is a more important reason that I don’t cook with used frying oil: my sons’ eczema!

I know some mothers of children of eczema just don’t give their children  fry food to avoid flare up. But we still love to have  fried food from time to time.  I also collect the grease from meat roasting, or meat broth. I’ve seen people simply dump these oil into either their sinks or trash cans. I’ve seen flyer from Japanese governor which had a photo of a housewife dumping used oil into sink and the effects the oil caused from her sink to persuade people not to dump used oil into their kitchen sink.

I must find a way to use the accumulating used oil and grease. Making soap was the first thing I could think of.

I started making soap when I moved to Taiwan in 2004 with used oil. I thought it’s possible to make soap that way. When I was in grade school, there’s a soap factory near my school which made soap out of used oil.

So I consulted the big book : The Encyclopedia of Country Living for all the recipes of soap making.

In that book, all the recipes are for cold processed soap, for the author has safety reasons not to hot process soap. Indeed it could be dangerous to hot process soap, especially when it involves high temperature with caustic lye and oil mixture.

No matter how long I cure my soap, there were always problems with my soap:

  1. They were caustic, no matter how accurately I did the measurement or how long I cured  them. My skin would feel like been rubbed with sand paper after use.
  2. They were greasy.
  3. They turned rancid after several month.

I also purchased homemade soaps from other people and found the same problems.

So I borrowed all the soap making books from the library to read, trying to find problems in my soap.

Obviously the soaps were not completely neutralized. The skin biting, greasiness, and tendency to turn rancid all point to incomplete neutralization.

Many soap books stress the same importance of neutralization of soap. Waiting for the soap to cure does not work for me, obvious not for many other soap vendors, too. I haven’t used a homemade soap which has not the property of my cold processed soap. One thing I was sure: there must be a way to neutralize soap, I just need to know how.

Then one day I came across the book

Making Natural Liquid Soaps: Herbal Shower Gels, Conditioning Shampoos, Moisturizing Hand Soaps, Luxurious Bubble Baths, and more

by Catherine Failor and learned how to make hot processed liquid soap.

The main difference between liquid soap and bar soap other than solvent is the types of lye.  I guessed there’s a book from the same author about bar soap.  Later I found that book from other library:

Making Transparent Soap: The Art Of Crafting, Molding, Scenting & Coloring

At that time I still need to know how to make perfect soap out of my cache of used oil and meat dripping.

In the  book The Encyclopedia of Country Living there are methods under Clarifying Dripping and Removing Salt and Removing Rancidity that you can purify used oil by cooking used oil with water ( 1 qt. water per gal oil)  and remove rancid fat  with vinegar ( 1 part vinegar with 5 parts water, use 1 qt mixture per gal of used oil) . I haven’t seen any fat cake described in the book after cooking and cooling. There’s usually foam forming with other dark speckles, so I just skim it off.

Failor’s books show steps to hot process, neutralization, and test for soap neutralization. She honestly states that her recipes contain more lye for easy saponification .  She uses citric acid , boric acid, or borax solution to neutralize her soaps.

In order to remove all the problems from my cold processed soap, the soap needs to be completely neutralized. That is impossible for cold processed soap, and I found the reason later.

I don’t want to spend extra money to buy citric acid to put into my soap, yet boric acid or borax is toxic and water  used with soap containing them can’t be used to water plant. After more book reading I tried the pioneer way: add more substrate to cook:

If the soap needs more lye, add lye solution to cook. If the  soap is too alkalinic, add more oil to cook.  

At that time I had problem buying phenolphthalein without a credit card, I need something that I could get easily from grocery store. I was fortunate to find roselle tea which turns blue when the soap contain free lye. Though I hate to use petroleum products, before making neutral soap successfully, I used Down dish soap, which test neutral ( pink) with roselle tea. A hint of baking soda will change the color of roselle tea from pink to blue. You can buy loose roselle tea from most oriental groceries. I had roselle tea in my house long before my soap making. People in my country put roselle with other herbs to make delicious sweet-sour drink called sour plum soup.

The basic steps of making neutral soap are build upon cold process soap making.

  1. Mix ingredients of soap and stir (or blend) until trace.
  2. Keep the mixture from losing heat (like wrapping the container with blanket. I use gallon size thermo pot , which is popular in my country and Japan to simmer food to save gas bill. The heat produced by saponification will be kept inside the pot to cook the soap to a perfect amber jel for the next step.) After 2-3 hours the heat from soap saponification will turn the soap to a mass of amber gel.
  3. Test the soap to see if it need to be neutralized. If the alkaline indicator (Phenolphthalein -alcohol solution or roselle tea) shows that the soap is alkalinic, stir in 20% citric acid, 20% boric acid, or 33% borax (all are dissolved in pure water) to neutralize the soap. Test for alkaline again, until the alkaline indicator shows that the soap is completely neutralized. ( I simply stir in more oil to cook  for 15 minutes then test again.)
  4. Add solvents like glycerin, sugar, and alcohol to soap to make transparent soap. ( I skip this step.)
  5. Pour soap into mold. Cut the soap into using size after soap hardened.

You can find more details and recipes in

Making Transparent Soap: The Art Of Crafting, Molding, Scenting & Coloring

For me I simply wanted to transform my fry oil and meat dripping into something useful, so at the beginning I didn’t make transparent soap. Later I had more confidence of soap making, I used fry oil to try more interesting soap patterns. The house usually smelled like I was frying something and children would constantly come up and ask,” Are you frying chicken ?”

The neutralized soap  mixture is extremely hard to stir, and is difficult to mold perfectly without extra solvent like alcohol.

After mastering soap neutralization, I found all the recipes including those that guarantee long curing time will turn soap neutral contain excess lye, and the soaps made with those recipes are impossible to become neutral no matter how long you cure the soap. The percentages of lye to oil  are usually higher than necessary. You need to figure out how much extra oil you need to use with a certain brand of oil. I will not make cold process soap anymore.

Some elders who got my neutral soaps as gifts told me this kind of soap made their dry patches on skin disappeared.  I also noticed that the psoriasis patches on my knees disappeared after few months I switched to my home made neutral soap completely in bathing (including washing hair), washing dishes, pets, and doing laundry. I had psoriasis since my 4th grade, when the petroleum shampoo, laundry detergent, and dish detergent began to replace pioneer cleaning methods in my family, about 38 years ago.

Later I tried to make pure olive castile soap and found it’s the best soap I’ve ever used. I also experimented adding different skin pampering herbs into my soaps. Some herb like jewel weed made the soap almost impossible to dry. Other soap maker simply add stearic  acid to harden it. I am stubborn enough to let my jewel soap dry over half year. Since the soap is carefully neutralized, there’s no excess oil to turn the soap rancid.

My soap making journey formally started in 2004. I only knew how to neutralize my soap in 2012. I’d made lots of bad soaps!

If you want to skip the trouble to make your own, you may buy neutral soap from My Etsy shop. All the soaps in my shop are made with pure olive oil and the herbs from my nature farm. Believe it or not, the best selling soaps in my craft show booth are the unscented ones!